Forms With z3c.form
The next logical step for ZContact is to be able to add contacts using a form that asks us for the first and last name of the new contact. We can generate such a form from the schema (IContact) we defined in interfaces.py using the z3c.form package.
Adding z3c.form and z3c.formui as Dependencies
Before we can use z3c.form though, we have to add it as a dependency to our application.
To add z3c.form as a dependency, open up setup.py in the root directory of your application and add 'z3c.form', to the install_requires parameter (should be near line 25). At this time you should also add z3c.formui and z3c.layer as dependencies, which is needed to render the form in a nice layout.
Next you will want to include the zcml configuration for z3c.form and z3c.formui into the configure.zcml file located in zcontact/src/configure.zcml. z3c.form makes use of numerous other z3c.* components which define new zcml directives. To use these directives, you must include meta files at the top of the configure.zcml before any other includes:
<include package="zope.viewlet" file="meta.zcml" />
<include package="z3c.form" file="meta.zcml" />
<include package="z3c.macro" file="meta.zcml" />
<include package="z3c.template" file="meta.zcml" />
Next you want to include the actual z3c.form and z3c.formui packages at the end of the configure.zcml file:
<include package="z3c.form" />
<include package="z3c.formui" />
Now all we have to do is rerun the buildout process so that the new eggs for z3c.form and z3c.formui are downloaded and made available. Just run:
$ ./bin/buildout -N
The -N option skips downloading eggs you already downloaded (highly recommended).
Setting up your Application to Work with z3c.form
Unfortunately, we aren’t quite ready to use z3c.form. Since the z3c packages have created a somewhat different pattern for building applications, there are some extra steps to get them working. One of these steps is setting up your own layer and skin. Unfortunately, many zcml directives don’t force you to explicitly say which layer you want the page or view registered for. When you don’t specify the layer, it gets registered with a default layer. It turns out that many packages (including Rotterdam) register all their views on the default layer, making this layer highly polluted with stuff we don’t want. To avoid this pollution, the z3c.* packages register all their views on layer specific to the package in question. To use the z3c.* package properly, you must extend these layers with your own layer. Now we will create a layer that allows us to use views from the z3c.form package.
Creating a Layer
Create a new file, src/zcontact/layer.py and add the following code:
from z3c.form.interfaces import IFormLayer
from z3c.layer.pagelet import IPageletBrowserLayer

class IZContactBrowserLayer(IFormLayer, IPageletBrowserLayer):
    """ZContact browser layer with form support."""
IFormLayer has views for all the widgets used in the generated forms and IPageletBrowserLayer provides some error and other useful utility views.
Creating a Skin
To access this layer from a browser, we have to create a skin. So create another file, src/zcontact/skin.py and add the following code:
import z3c.formui.interfaces

from zcontact import layer

class IZContactBrowserSkin(z3c.formui.interfaces.IDivFormLayer,
                           layer.IZContactBrowserLayer):
    """The ZContact browser skin using the div-based layout."""
Note that our skin is going to inherit from the IDivFormLayer layer, defined in the z3c.formui package. When the forms get rendered, fields will appear in <div> tags rather than in a table. There exists another layer for a table based layout. Thanks to the component architecture, it is equally possible for you to write your own custom form layout layer, but we won’t do that here.
Now we must register the skin in zcml with a new file, src/zcontact/skin.zcml. We will make our skin accessible at http://localhost:8080/++skin++ZContact/ which should look like this:
<configure xmlns="http://namespaces.zope.org/zope">

  <interface
      interface=".skin.IZContactBrowserSkin"
      type="zope.publisher.interfaces.browser.IBrowserSkinType"
      name="ZContact"
      />

</configure>
Don’t forget to include this new zcml file in zcontact/configure.zcml with the line <include package="zcontact" file="skin.zcml" />.
Creating an Add Form
We’ll start with creating a new module, zcontact.browser, by adding a browser directory to the src/zcontact/ directory along with an empty __init__.py file. Now we can create and open a new file, zcontact/browser/contact.py where we will define all the forms.
Start by adding the following code to the browser/contact.py file:
from z3c.form import form, field

from zcontact import interfaces


class ContactAddForm(form.AddForm):
    """A simple add form for contacts."""

    fields = field.Fields(interfaces.IContact)
The form.AddForm class that we inherit from just defines some methods for creating and adding our new object, which we will override later, and some buttons typically found on an add form.
Next we will add a page that uses this class to display the form. Open zcontact/browser/configure.zcml and add the following:
<configure xmlns="http://namespaces.zope.org/browser">

  <page
      name="addContact.html"
      for="zope.app.folder.interfaces.IFolder"
      permission="zope.Public"
      layer="zcontact.layer.IZContactBrowserLayer"
      class=".contact.ContactAddForm"
      />

</configure>
We register the page with the name addContact.html and for the IFolder interface. Since the root folder of every new zope instance implements IFolder, we should be able to access this page at http://localhost:8080/++skin++ZContact/@@addContact.html. Don’t forget to include the browser package in the zcontact/configure.zcml file by adding a line, <include package=".browser" /> to the bottom.
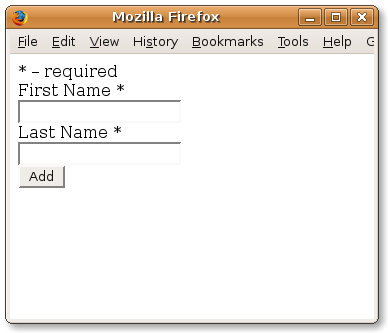
Now we should be ready for action, so restart the server by running ./bin/paster serve deploy.ini (or debug.ini if you want) and browse to http://localhost:8080/++skin++ZContact/@@addContact.html. You should see a very simple form like this:
Finishing the Add Form
If you actually tried to use the add form, and cliked the add button, you should have gotten a NotImplemented error. If you chose to run the debug.ini configuration instead of deploy.ini with paster, then you probably got a nice screen like this:
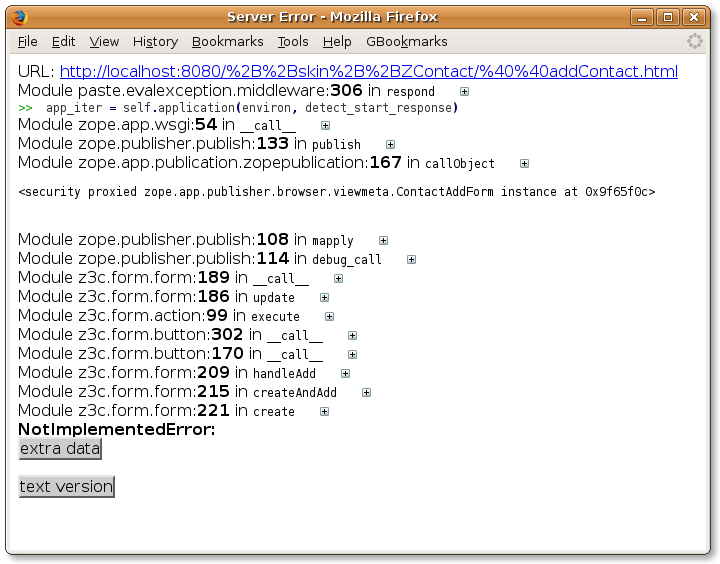
from this screen you can expand any line in the traceback and enter in python code to debug the problem. I was very impressed the first time I saw this.
To fix the problem, we must implement three methods for the ContactAddForm class: create, add and nextURL. I decided to implement it as below to keep it short, but feel free to get creative:
from z3c.form import form, field

from zcontact import interfaces
from zcontact.contact import Contact


class ContactAddForm(form.AddForm):
    """A simple add form for contacts."""

    fields = field.Fields(interfaces.IContact)

    def create(self, data):
        contact = Contact()
        form.applyChanges(self, contact, data)
        return contact

    def add(self, contact):
        self._name = "%s-%s" % (contact.lastName.lower(), contact.firstName.lower())
        self.context[self._name] = contact

    def nextURL(self):
        return '/'
In the create method, we used the form.applyChanges function to set the values for the firstName and lastName attributes of the new contact. The data passed to the create method is a mapping between field names and the data entered, already converted to the right python data types. For example, we could have done contact.firstName = data['firstName'].
I’ve set the nextURL method to return a hard coded path which should take you back to the default Rotterdam skin where you can see the newly created contact in the contents view. We do this because we have not yet written our own contents views for our own layer/skin and must go back to Rotterdam.
Display and Edit Forms
Display and Edit Forms are even easier than add forms because you don’t have to implement extra methods. Let’s start by creating such a Display form.
Creating a Display Form
To create the display form, we will want a new class that inherits from form.Form. To make the widgets display as plane text rather than input widgets, we must set the mode of the form to DISPLAY_MODE, which is a constant that can be imported from z3c.form.interfaces. Open up zcontact/browser/contact.py and add the following code:
class ContactDisplayForm(form.Form):
    """A simple display form for contacts."""

    fields = field.Fields(interfaces.IContact)
    mode = DISPLAY_MODE
and don’t forget to register the new form in configure.zcml with:
<page
    name="index.html"
    for="..interfaces.IContact"
    permission="zope.Public"
    layer="zcontact.layer.IZContactBrowserLayer"
    class=".contact.ContactDisplayForm"
    />
Now that we have a display form, we can change the nextURL method of the ContactAddForm to point to the newly created contact. It should look like this:
def nextURL(self):
    return absoluteURL(self.context[self._name], self.request)
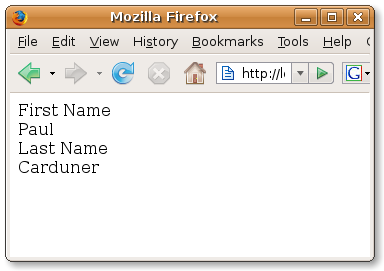
Don’t forget to include the line from zope.traversing.browser.absoluteurl import absoluteURL at the top of the file. If all goes well, you should be able to restart the server and add a new contact at http://localhost:8080/++skin++ZContact/@@addContact.html to then be taken to the display form. It will look like this:
Adding buttons to a form
Now let’s add two buttons, one for editing the contact and one to delete the contact. Start by adding from z3c.form import button at the top of contact.py. When a user clicks on a button, they submit the form to the url specified by the action attribute of the form. By default, the action is set to the url of the form itself so when we click on a form button, the form gets reloaded. As the form is being processed, it checks which button was pressed and calls appropriate handlers which are defined as methods of the ContactDisplayForm class.
With z3c.form, we can define a button and a handler at the same time using a decorator. For the delete button, we’ll want to delete the contact and send the user back to the add form. Add the following code to the ContactDisplayForm class:
@button.buttonAndHandler(u'Delete', name='delete')
def handleDelete(self, action):
    name = getName(self.context)
    parent = getParent(self.context)
    del parent[name]
    nextURL = absoluteURL(parent, self.request)+'/@@addContact.html'
    self.request.response.redirect(nextURL)
Be sure to add the following imports to the top of the file:
from z3c.form import form, field, button
from z3c.form.interfaces import DISPLAY_MODE
from zope.traversing.browser.absoluteurl import absoluteURL
from zope.traversing.api import getParent, getName
Now we’ll add an Edit button. We don’t yet have an edit form yet, so the edit button will take us to a page that doesn’t exist. For now we will just put it in as a place holder. Add the following to the ContactDisplayForm class:
@button.buttonAndHandler(u'Edit', name="edit")
def handleEdit(self, action):
    nextURL = absoluteURL(self.context, self.request) + '/@@editContact.html'
    self.request.response.redirect(nextURL)
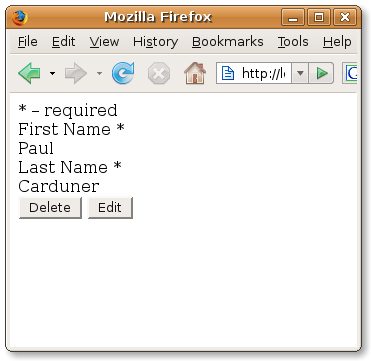
Now you can restart the server and try out the buttons. Your form should now look like this:
Creating an Edit Form
By now you should nearly be a pro at this auto generated form stuff. Our final step is creating an edit form, which is the simplest form of them all. Here is the code to add:
class ContactEditForm(form.EditForm):
    """A simple edit form for contacts."""

    fields = field.Fields(interfaces.IContact)
along with the necessary zcml configuration:
<page
    name="editContact.html"
    for="..interfaces.IContact"
    permission="zope.Public"
    layer="zcontact.layer.IZContactBrowserLayer"
    class=".contact.ContactEditForm"
    />
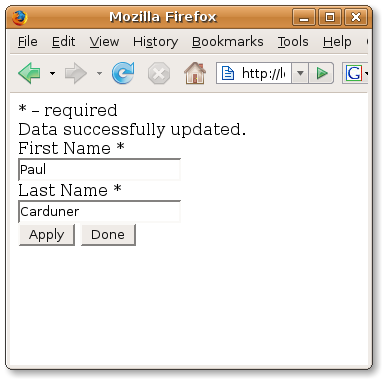
Go ahead and try out the edit form by clicking on the Edit button from the display form. You’ll notice that we already have an apply button to submit the changes. After editing, we are presented with a status message explaining either success or failure. At this point, we want a way to get back to the add form, so add a ‘Done’ button to the ContactEditForm class with the code:
@button.buttonAndHandler(u'Done', name='done')
def handleDone(self, action):
    self.request.response.redirect(absoluteURL(self.context, self.request))
But wait! As soon as we create our own button, we override the buttons declared in the form.EditForm class. To avoid this, we must extend the form.EditForm class by putting form.extends(form.EditForm) just after the ContactEditForm class declaration. In otherwords, ContactEditForm should now look like this:
class ContactEditForm(form.EditForm):
    """A simple edit form for contacts."""
    form.extends(form.EditForm)
    fields = field.Fields(interfaces.IContact)

    @button.buttonAndHandler(u'Done', name='done')
    def handleDone(self, action):
        self.request.response.redirect(absoluteURL(self.context, self.request))
You should now have an edit form that looks like this:
Rounding out the Application with a Front Page
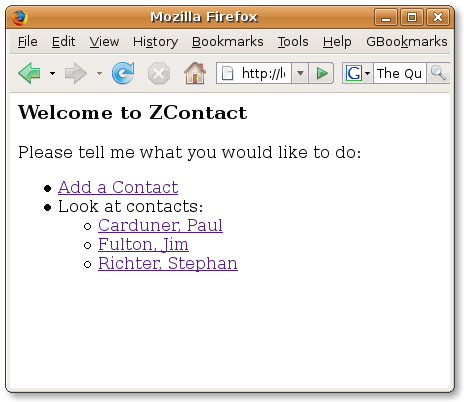
Before we jump right into skinning, let’s make one more page to kind of round out our application. This next page will be the main front page for our application and will provide a link to the add contact form, and links to each of the existing contacts. This can all be done in a simple page template in zcontact/browser/frontpage.pt:
<h3>Welcome to ZContact</h3>
<p>Please tell me what you would like to do:</p>
<ul>
  <li><a href="@@addContact.html">Add a Contact</a></li>
  <li>Look at contacts:
    <ul>
      <li tal:repeat="contact context/values">
      <a tal:attributes="href contact/@@absolute_url"
         tal:content="string:${contact/lastName}, ${contact/firstName}">Last, First</a>
      </li>
  </ul>
  </li>
</ul>
To make this appear for the front page of our application, we are going to register the page in zcml for the IRootFolder interface. Add the following to zcontact/browser/configure.zcml:
<page
    name="index.html"
    for="zope.app.folder.interfaces.IRootFolder"
    permission="zope.Public"
    layer="zcontact.layer.IZContactBrowserLayer"
    template="frontpage.pt"
    />
Restart your server and check it out at http://localhost:8080/++skin++ZContact/ and you should have something that looks like this:
With a few forms in place and a decently working app, we can start looking at other z3c.* packages.