At 0430 in the morning of 4 June 1942, while 240 miles northwest of Midway, Vice Admiral Chuichi Nagumo's four carriers began launching 108 planes to attack the U.S. base there. Unknown to the Japanese, three U.S. carriers were steaming 215 miles to the east. The two opposing fleets sent out search planes, the Americans to locate an enemy they knew was there and the Japanese as a matter of operational prudence. Seaplanes from Midway were also patrolling along the expected enemy course. One of these spotted, and reported, the Japanese carrier striking force at about 0530.
That seaplane also reported the incoming Japanese planes, and radar confirmed the approaching attack shortly thereafter. Midway launched its own planes. Navy, Marine and Army bombers headed off to attack the Japanese fleet. Midway's Marine Corps Fighting Squadron 221 (VMF-221) intercepted the enemy formation at about 0615. However, the Marines were immediately engaged by an overwhelming force of Japanese "Zero" fighters and were able to shoot down only a few of the enemy bombers, while suffering great losses themselves. This action convincingly demonstrated the inferiority of the Americans' Brewster F2A-3 "Buffalo" fighter, and the marginal capabilities of the somewhat better Grumman F4F "Wildcat", when confronted by the fast and nimble "Zero". Among the Marine losses was VMF-221's commanding officer, Major Floyd B. Parks.
The Japanese planes hit Midway's two inhabited islands at 0630. Twenty minutes of bombing and straffing knocked out some facilities on Eastern Island, but did not disable the airfield there. Sand Island's oil tanks, seaplane hangar and other buildings were set afire or otherwise damaged. As the Japanese flew back toward their carriers the attack commander, Lieutenant Joichi Tomonaga, radioed ahead that another air strike was required to adequately soften up Midway's defenses for invasion.
This page presents views of the air attack on Midway, including
the fighter action that immediately preceded it. For photographs
of damage caused by that attack, see:
For artworks of the air attack on Midway and its results,
see the Navy Art Gallery page:
For links to views of other aspects of the Battle of Midway,
see:
| If you want higher resolution reproductions than the Online Library's digital images, see: "How to Obtain Photographic Reproductions." |
Click on the small photograph to prompt a larger view of the same image.
|
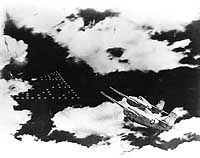
Photo #: 80-G-701850 Battle of Midway, June 1942 Diorama by Norman Bel Geddes, depicting the lead elements of Marine Fighting Squadron 221 (VMF-221) intercepting the Japanese air strike formation headed toward Midway in the morning of 4 June 1942. Planes in the foreground are F4F-3 "Wildcat" fighters. Official U.S. Navy Photograph, now in the collections of the National Archives. Online Image: 76KB; 740 x 610 pixels Reproductions of this image may also be available through the National Archives photographic reproduction system. |
 |
|
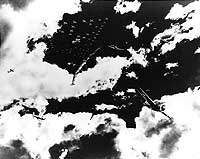
Photo #: 80-G-701851 Battle of Midway, June 1942 Diorama by Norman Bel Geddes, depicting the air battle between Marine Fighting Squadron 221 (VMF-221) F2A-3 "Buffalo" and F4F-3 "Wildcat" fighters and Japanese Navy Type 00 carrier fighters, as the Marines attempted to intercept the Japanese bomber formation en route to attack Midway in the morning of 4 June 1942. Official U.S. Navy Photograph, now in the collections of the National Archives. Online Image: 88KB; 740 x 615 pixels Reproductions of this image may also be available through the National Archives photographic reproduction system. |
 |
|
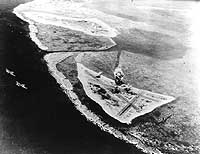
Photo #: 80-G-701852 Battle of Midway, June 1942 Diorama by Norman Bel Geddes, depicting the the Japanese carrier air attack on Midway in the morning of 4 June 1942. Two Type 00 carrier fighters are at left. Eastern Island airfield is under attack in lower center. Sand Island is in the upper left center, with hits visible in the vicinity of the seaplane hangar. Official U.S. Navy Photograph, now in the collections of the National Archives. Online Image: 108KB; 740 x 595 pixels Reproductions of this image may also be available through the National Archives photographic reproduction system. |
 |
This page presents views of the air attack on Midway, including
the fighter action that immediately preceded it. For photographs
of damage caused by that attack, see:
For artworks of the air attack on Midway and its results,
see the Navy Art Gallery page:
For links to views of other aspects of the Battle of Midway,
see:
NOTES:
| If you want higher resolution reproductions than the Online Library's digital images, see: "How to Obtain Photographic Reproductions." |
Page made 18 April 1999
Introductory text updated 6 May 2009