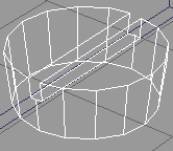
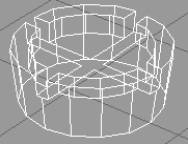
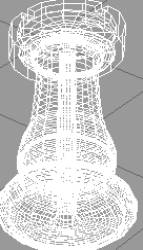
How to Build A Rook
By Brad Hudson
This tutorial will show you how to use the “lathe” tool, as well as the “face edit” tool and “Boolean subtractions”. It’s ok if those terms mean nothing to you, I’ll show you what they are. When all these tools are used together, you will be able to build a chess piece known as the rook, or the castle as some people call it.
|
Your first job is to make sure you are in Caligari trueSpace 3. Go to the “Start” menu at the bottom left of your screen and scroll up to “Programs” then go to “Caligari trueSpace 3” |
|
|
|
When you enter the program, a new scene will already be loaded. You have entered the world of 3D Modeling. The view you are in now is called the “Perspective View”. You will need to be in the “Top View” to build the body of the rook, which will be our first task. Click and hold on the “Perspective View” button (Blue Arrow) and scroll up to “Top View” (Red Arrow). Then unclick. |
|
|
|
Notice how the squares on the gray background have changed appearance. You are now looking from directly above what you will be working on |
|
|
|
Now we start to build the body. Click on the “Spline Polygon” button. |
|
|
|
Take a moment to notice that your information bar tells you whatever tool you have selected. |
|
|
|
Now begins the hardest part of building your rook. (Building the body) You must picture in your head what half of the rook body would look like. Look at a rook and draw what it would look like in half. The tool you are using makes points…this means you have to draw a “connect the dots” type thing to build the body. This will take a whole lot of practice to get down correctly; so don’t worry about messing up a few dozen times. |
|
|
|
Once you finish making the “connect the dots” drawing. You must unselect it by left clicking on the “Object Tool” button. |
|
|
|
Now go to the “Sweep” tool and left click and hold it down. Scroll up to the “Lathe” button. Let go of the left click. The red arrow points to the “Sweep” button, the blue arrow points to the “Lathe” button. |
|
|
|
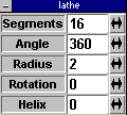
Once you have selected the “Lathe” tool, right click on it. This pop-up window will appear. You want to change the angle from 270, to 360. |
|
|
|
Now that you have adjusted the angle, left click the “Lathe” tool again. You should see a horizontal line and a vertical line appear. Drag the vertical line to the flat edge of your drawing. |
|
|
|
It should look like this. |
|
|
|
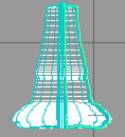
Now click the “Lathe” tool one more time. Your object should become 3D. |
|
|
|
Now we have to put the top of the castle on. Click on the “Object Tool” again (the arrow) to unselect the body of your rook. Go to the “View” button again and select the “Perspective View”. The red arrow points to the “View” button, the blue arrow points to the “Perspective View” button. |
|
|
|
Right click on the “Object Tool” button (the arrow) and change all the rotations to 0. |
|
|
|
Your rook body should look like this now. |
|
|
|
Minimize the “Object Info” box my clicking the minus sign in the top left hand corner of the box. |
|
|
|
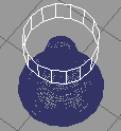
Click and hold on the “Add Cube” button. Scroll up to the “Add Cylinder” button. The red arrow points to the “Add Cube” button. The blue arrow points to the “Add Cylinder” button. |
|
|
|
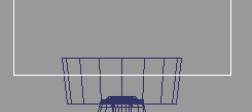
Go to “New Perspective View” and give yourself an added frontal view by scrolling up and clicking “New Front View”. The red arrow points to the “New Perspective View”. The blue arrow points to the “New Front View” |
|
|
|
Right click on the “Object Tool” button again (the arrow button). Make sure both the new cylinder and your rook body has every location set at 0. |
|
|
|
Make sure you have the cylinder selected (it will be white) and start lowering the size of the cylinder to fit on the top of your rook body. Use both your perspective view and your front view to help you. The “X” and the “Y” must be the same. That will determine the diameter of your cylinder. The “Z” value determines its height. |
|
|
|
Now change the “Z Location” to fit the cylinder on top of your rook body. |
|
|
|
Now use your “Eye Rotate” button to view the top part of your rook. The blue arrow points to your “Eye Rotate” button. |
|
|
|
Click on “Point Edit: Context” and scroll up to “Point Edit: Faces”. The red arrow points to “Point Edit: Context”. The blue arrow points to “Point Edit: Faces” |
|
|
|
Now click on the top of your cylinder. It should highlight it in bright green. |
|
|
|
Now go to your “Object Info” box, if you still have it open. If not, right click on the “Object Tool” button again. (the arrow). Make the “X Size” and the “Y Size” just a little bit bigger. (Make sure they are the same) You should notice the top part of your cylinder is larger now. |
|
|
|
Now left click on the “Object Tool” button again to unselect your rook. Give yourself another new view by going to “New Front View” and scrolling up to “New Top View”. The red arrow points to the “New Front View” button and the blue arrow points to the “New Top View” button. You now should have your main view and 2 secondary views. |
|
|
|
Now you need to make the little rivets in the roof of your castle. Go to “Add Cylinder” and scroll up to “Add Cube”. The red arrow points to the “Add Cylinder” and the blue arrow points to the “Add Cube” button. |
|
|
|
Go to your “Object Info” box (right clicking on the arrow button) and change either the “X Size” or the “Y Size” to something very small. |
|
|
|
Now use your front view to move your cube to the roof of your castle. Remember to use the “Z Location” column in the “Object Info” box. |
|
|
|
Select your cylinder by left clicking on it. Then right click on the “Object Subtraction” button. This screen should pop up. Select “Keep Drill” |
|
|
|
Now click on the “Object Subtraction” Button. You should see the cylinder has been cut out where the box was. |
|
|
|
Now rotate the box 90 degrees on the Z-Axis. Use the “Object Info” box. Now click the cylinder again and subtract the box one more time. It should make a cross cut out shape. |
|
|
|
You can delete the box now by going to the “Undo” button and scrolling up to “Delete”. The red arrow points to the “Undo” button, the blue arrow points to the “Delete” button. |
|
|
|
Now you need to make a new cylinder. Make it slightly smaller than the first one you made. You will use it to cut out the ridge in the top of the roof of the castle. Position it above your current roof like this. |
|
|
|
The last step is to use the “Object Subtraction” button one last time. Select the roof, then object subtract the new cylinder. It should look like this. |
|
|
|
Now you have to glue all your pieces together. Go to “Glue as Child” and click on it. |
|
|
|
Click on each of your separate pieces so they are all highlighted at once. |
|
|
|
Your rook is all done now. You can “Render Current Object” if you want to see it. |
|
|
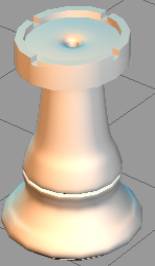
Good Luck!!
 This is in the bottom right of your screen.


 The green dots are the points you must draw.


