Shadow Maps
|
|
The First thing you will need to make appropriate shadows is your lighting in the right place. This Asterisk is the lighting for your scene. |
|
|
|
Click on the object move button, and then move your light to where you want your shadows to be cast. |
|
|
|
First set the intensity of your lights with the light intensity bar. The Higher you go up on the bar the brighter the light will be. The Most important step is to press the toggle shadows button. When you hit this it casts shadows on the object depending on where you put your lights. |
|
|
|
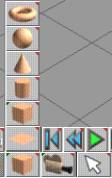
For shadows to be cast you will need your object to be on a surface of some sorts. First pick a plane from the shape toolbar. |
|
|
|
Then click on the object scale button and left click on the plane. Then drag it until it is covering the whole grid. |
|
|
|
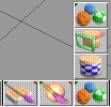
For colors that aren’t your usual solids select the material library button and drag up to the material library button. |
|
|
|
Left click on a texture and exit out of this screen by hitting the line in the upper left hand corner. |
|
|
|
Now if you want a basic solid color you can get it easily. Right Click on the paint face button |
|
|
|
You now can choose your material color with this chart. Move the square to the exact color that you want it |
|
|
|
You can also set the attributes of the color with the attribute bars in the far right box |
|
|
|
Once you have selected your color all you have to do is fill it in with its color. To do this all you have to do is click on the paint object icon and it will fill in whatever color you chose. |
|
|
|
This is what your finished product should look like. If you follow all of my steps. |
|
|
|
|
|
|
|
|
|
|
|
|
|
|
|
|
|
|
|
|
|
|
|
|
|


